Universal Render Pipeline
Unity 6 And Above
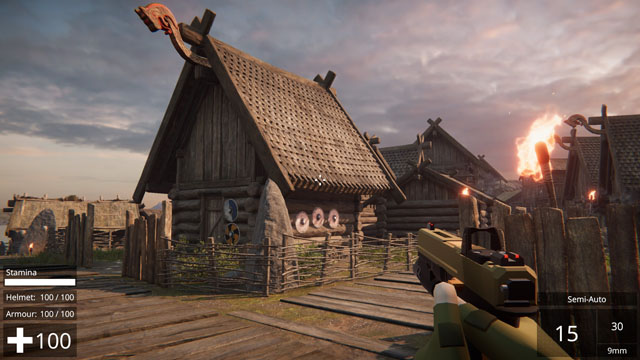
As of the NeoFPS 1.1.36 update, the NeoFPS demos now leverage URP and the input system by default instead of the older built-in render pipeline and legacy input manager. If you are creating a new NeoFPS project with Unity 6, then all you need to do is create a new URP project, import the NeoFPS asset, and then follow the steps in the Unity Settings page of the NeoFPS Hub.
The instructions below are mostly relevant to Unity versions below Unity 6.
Installation
In order to use the high-definition render pipeline with NeoFPS, the following requirements must be met:
- You must be using Unity 2020.3 or higher
- You must import the Universal RP package version 10.9 or greater
To import the universal render pipeline Unity package, you must use Unity's Package Manager. The layout and wording of the package manager can vary between Unity versions, but the first thing required is to set the package manager to show the packages in the Unity Registry. This will show all the available Unity add-on packages that you can add to your project, as opposed to the "My Assets" or "In Project" options.
While looking at the unity registry, you should be able to find a package called Universal RP (com.unity.render-pipelines.universal). Make sure to download version 10.9 or greater and then import it into your project.
Once the URP package is imported, you will need to assign a Universal Render Pipeline Asset to the Scriptable Render Pipeline Settings in Edit/Project Settings/Graphics. An alternative to the above process is using the Universal Render Pipeline Project Template when first setting up your project via the Unity Hub. This will import the latest package and apply it in the graphics settings for you so that you can skip to the next step.
With the URP package imported and set up, you can now import the NeoFPS URP extension package. The best way to do this is via the Unity Settings page in the NeoFPS Hub. This will track the selected pipeline and notify you of any changes to the package with each NeoFPS update.
The NeoFPS URP extension package comes with a number of replacement materials for the NeoFPS demos, though not every material will be changed. In some cases, there is no equivalent material due to differences between URP and built-in. An example would be the holographic and red dot sight reticule materials which are not used in URP since the reticules are built into the glass shader instead. You can find more information on this below.
If your project still has materials that are using the built in render pipeline, you will need to use the pipeline converter tool found under Window/Rendering/Render Pipeline Converter. Select the Material Upgrade section, then click on the Initialize And Convert button at the bottom to convert the materials.
You may also need to tweak and re-bake lighting in your scenes once the render pipeline has been changed. Different versions of Unity and URP have differences in how they group lightmap UVs, and also in how light and reflection probes work. Due to the size of baked light maps it is not feasible to bake and include packages for different combinations, so in the cases where light maps are broken in the demo scenes you will need to clear baked lighting and bake again. This might require tweaking the scene lighting settings to suit your hardware and the lighting behaviour of this specific SRP version.
Post-Processing
The universal render pipeline comes with an integrated post processing solution, however its volumes and profiles are not compatible with the Post Processing Stack V2 that Unity uses with the built-in render pipeline. It is advised to remove the Post Processing Stack via the package manager to prevent getting them mixed up.
To get post-processing properly working with the NeoFPS demos there are a few things you need to do:
- Modify the cameras for your characters and spawners, setting their Volume Mask setting to include Default and PostProcessingVolumes
- Enable the Post Processing setting on the cameras
- Replace any PostProcessingVolume or Missing Script components on the post processing volume objects in the scenes with the new Volume components.
- Set the volume components to Local for collider based volumes such as the underwater zones in the swimming demo.0.
- Assign one of the provided profile assets to the volume or create a new one as desired.
If you are moving from a built-in render pipeline project to URP then you might already have the old post processing stack package imported in your project. When this package is imported it adds the scripting define UNITY_POST_PROCESSING_STACK_V2 to your project. NeoFPS uses this to compile code specifically for the post processing package. Unfortunately, removing the package does not remove the scripting define and can cause errors with code that requires the package to be present. You will need to do this manually. To do this, open the project's Player Settings and navigate to the bottom to find the Script Compilation section. Here you will find a setting called Scripting Define Symbols. This might be an array, or it might be a single string with multiple entries each separated using the semicolon (';') character. Delete the entry called UNITY_POST_PROCESSING_STACK_V2 and the code that requires that will no longer be compiled.
Holographic and Red Dot Sights
Due to the changes in the way stencils work in the SRPs, the holographic sights have been modified in the NeoFPS SRP extension packages to use a new single shader, single mesh approach. The old shaders used a separate quad far in front of the weapon that had the reticule texture on it, and then used stencils to make sure that it was only visible through the glass of the holographic sight. The new system projects the reticule into the uv space of the glass itself, so does not need multiple objects or stencils.
The extension packages should replace the demo optics with URP compatible versions, but you can also find replacement versions of the demo optics in the Assets/NeoFPS/Extensions/RenderPipelines/Prefabs/ folder. The replacement optics work for both HDRP and URP.
To manually switch a holographic or red dot sight, you can use the following steps:
- Find the holographic sight object in the weapon or attachment hierarchy
- Delete the reticule mesh from the hierarchy. This will be a quad that is parented to the sight object, and is referenced by the HolographicSight behaviour's Reticule property
- Replace the HolographicSight behaviour with a HolographicSightSRP behaviour, copying over the settings. A simple way to do this is to switch the inspector to debug mode and then change the Script property to point at the SRP version of the script.
- Find the glass mesh for the sight and replace its material with one that uses the Optics_HolographicSight or Optics_RedDot shader graph depending on the scope type. The NeoFPS URP and HDRP packages come with an example for each, with a material name matching the shader name.
Note: The built in shader version used separate shaders for the reticule materials instead of the glass materials to differentiate between holographic and red dot sights. This also means that extracting the NeoFPS URP or HDRP package will overwrite the existing weapon sight glass material with the new holographic sight version, changing the demo optics to all use a holographic sight reticule. To switch your red dot sights back to using a dot reticule, you can either swap the scope with one of the prefabs provided in the RenderPipelines/Prefabs folder, or change the scope's glass material to the correct type to fix this.
Render Texture Scopes
Similarly to the holographic and red dot scopes, the render texture scopes also require some manual steps in order to work with URP or HDRP. The way the shader properties are set has changed, and so the scopes require a different behaviour script to control the fade, reticule and parallax. To switch your render texture scopes to URP/HDRP, replace the RenderTextureScope behaviour with a RenderTextureScopeSRP behaviour. A simple way to do this is to switch the inspector to debug mode and then change the Script property to point at the SRP version of the script. If you are using the scope lens material from the NeoFPS demos then extracting the NeoFPS URP or HDRP package should replace the material with one that uses the new SRP shader. If not then you will need to switch your material to use the Optics_RenderTextureScope shader graph.
Stencil Scopes
Stencil scopes are not currently working with the SRPs at this time. Currently, working with stencils in URP or HDRP requires the use of the Render Objects Feature within the renderer asset. To recreate the stencil scopes from NeoFPS this requires the addition of 4 Unity layers dedicated to the different parts of the scope, along with a complex setup.
Hitscan and Projectile Trails
Each of the bullet trail materials from the NeoFPS demos will have been replaced with alternatives that use the SRP shader graphs when you extracted the NeoFPS URP or HDRP package. If you have your own custom trail materials then you will need to replace their shaders with the shadergraph equivalents. Most of these can be found in the RenderPipelines\ShaderGraphs\Shared folder and will start with BulletTrail_. The distortion bullet trails are SRP specific, so you will find the URP version in RenderPipelines\ShaderGraphs\URP\BulletTrail_Distortion_URP.shadergraph.