Firearm Attachments
Overview
NeoFPS provides a flexible attachments system with its modular firearms that can be leveraged in a number of ways. At its core, creating attachments with NeoFPS firearms simply means moving the firearm modules off the root object and into child objects that are activated/deactivated or instantiated/destroyed as required. You can create your own systems to do this, based on your needs, or you can use the example system that is provided with NeoFPS.
Firearm Attachment System
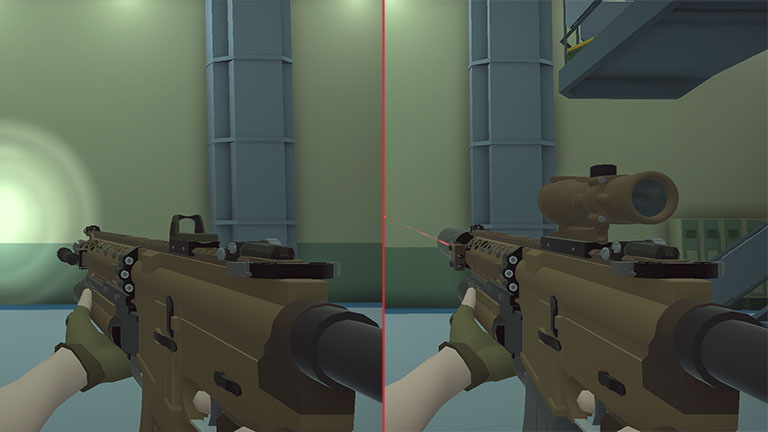
The example attachment system works through a combination of sockets and attachments. These are tracked via the ModularFirearmAttachmentSystem behaviour that must be added to the root of the gun alongside the firearm behaviour.
Attachments are the actual object that is swapped out on the weapon, and it can include things like scopes and optics, magazines, muzzle tips, etc. The only requirement is that they have a behaviour attached that implements the ModularFirearmAttachment base class. NeoFPS provides an example called the StandardModularFirearmAttachment, which allows you to (optionally) specify an inventory item that is required in order to use the attachment. You can create your own classes that inherit from the base class to add new restrictions, or react to being added/removed.
A socket is an object with the ModularFirearmAttachmentSocket behaviour added. This behaviour allows you to specify its socket name (eg, "Optics" or "Muzzle") and which attachments it accepts, along with its default attachment. The default attachment can be nothing, a specific attachment, or a random attachment from the available options. You can also inherit a custom class from this socket behaviour to add new default attachment logic.
Sockets are usually parented to the gun bone of the firearm, but they can also be parented to attachments themselves, creating nested sockets.
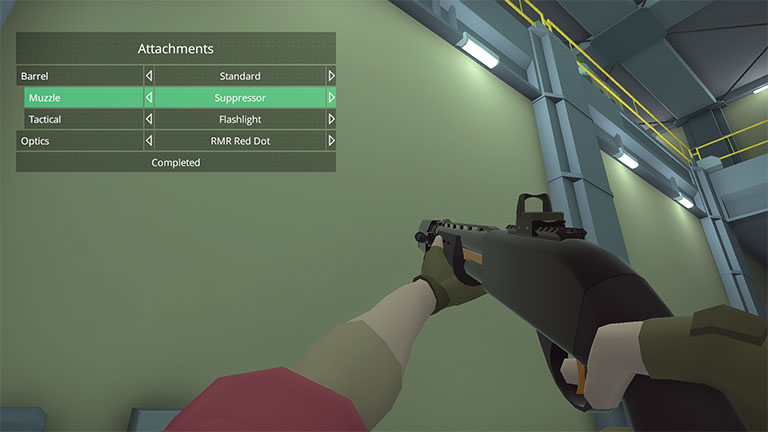
If you switch the parent attachment out to another one with a child socket of the same name, then the attachment from the original child socket will be transferred and realigned to the new one. An example would be switching the barrel on a shotgun with a shorter one, and the muzzle attachment transferring to the new socket position.
To change the attachments on a gun, an API is provided that allows you to get the sockets registered with the system, and then apply an attachment via prefab, index or ID. An example popup UI is also provided that provides a multi-choice picker for each socket, indenting any nested sockets under their parent. To use the UI you need to add a ModularFirearmAttachmentUIHandler behaviour alongside the attachment system. This is then pointed at a ModularFirearmAttachmentUIPopup prefab such as the one provided at: Assets/NeoFPS/Samples/Shared/Prefabs/Popups/FirearmAttachmentsPopup.prefab
You can also create a new popup style by inheriting from the base class of the example popup.
Another way to change attachments more directly is to create attachment pickups using the ModularFirearmAttachmentPickup behaviour. This can be attached to an interactive object or an interactive pickup. Use the latter if the attachment has an inventory object requirement, and you want the character to pick up the object at the same time.
The Demo Facility folder contains a selection of weapons that use the attachment system in the folder: Assets\NeoFPS\Samples\SinglePlayer\Scenes\DemoFacility\Weapons\ModdableWeapons
Optics Alignment
In order to align the camera to your weapon's optics when aiming down sights, an offset is calculated from the root node on start. This causes an issue with the attachment system as adding an optics attachment during play would mean that offset will be calculated based on the current position and rotation of the weapon. On start, the weapon will be in its default pose. During runtime, the weapon could be mid-way through an animation or influenced by any number of procedural animation effects.
To fix this problem, the attachments update added a new setting to the ModularFirearm behaviour called Aim Relative Transform. If you are using the attachment system with your optics, then you need to assign this property to a transform in the weapon hierarchy that moves with the gun itself. This will usually be the weapon bone that the firearm mesh is parented or skinned to. Once that is done, then instead of calculating the offset from the root on start for each optics / aimer, then the offset will be calculated relative to this transform. Since the optics socket will be a child of this transform, the offset for any optics / aimers attached to this socket will be correct no matter what the weapon is doing at the time.
Note: the firearm aimer modules can have trouble calculating the offsets if the socket they're attached to is not scaled at (1,1,1). If you need to change the attachment sizes then it is better to do that in the attachments themselves.
Flashlights and Laser Pointers
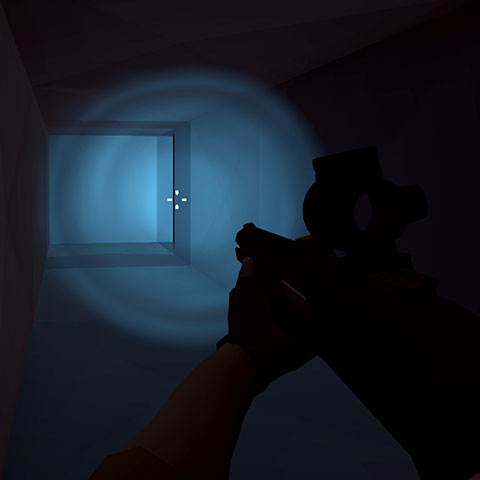
NeoFPS flashlights just use a spotlight object which is toggled on or off with the Flashlight input button. There is also an API for setting the flashlight's brightness.
For more information, see the WieldableFlashlight Reference. The Demo Facility moddable pistol, shotgun and assault rifle each let you attach a flashlight.
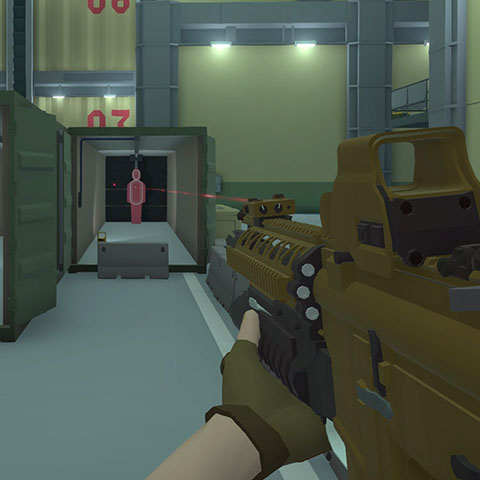
The laser pointer also uses the flashlight system to toggle on or off using the Flashlight input button. It uses a line renderer with a custom shader for the beam and a generated billboard quad for the flare at the point of impact.
Using laser pointers does have some gameplay implications. By default, the NeoFPS firearms use an accuracy system for determining where shots hit, and also use the camera / HUD crosshair to determine the direction to fire. As accuracy decreases due to recoil, movement or other modifiers, the bullets spread out from the aim point. This can feel wrong when you have a laser pointer attached to the weapon which shows you where each of your bullets should hit. You can help with this by changing some of the default settings on the weapon:
- Set the shooter modules to never use the camera aim. This means that the weapon will always fire directly in front of it.
- Reduced the max spread / max aim offset to a very low number.
These 2 changes will mean that bullets should always hit where the laser is pointing, though it also means that your weapons are now incredibly accurate. You can mitigate this by emphasising the procedural animation systems and keyframed animation on the model. For example:
- Add a WeaponAimAmplifier additive transform effect to rotate the weapon as you move your view
- Use a BreathingEffect additive transform effect along with either a SimpleBreathHandler or StaminaSystem on the player character to add breathing motion.
- Add a CameraShake additive transform effect to the weapon itself with a subtle amount of twist / rotation shake (no position shake).
- Add a RotationBob additive transform effect to the weapon to layer in rotation as you move instead of just the default position bob.
- Use the wander settings on the weapon's recoil handler module to increase the "spread" of the weapon when firing rapidly.
You can use the On Toggle On and On Toggle Off events on the laser pointer component to enable/disable the above components, or to change their settings while the laser is switched on.
Another component that can be used to modify the feel of a weapon with a laser pointer is the LaserPointerAimerSwitch. When a laser pointer is present, this behaviour detects when it is switched on or off, and switches the firearm's aimer module based on its state. This means that you can switch to a canted pose that obstructs less of your view with the laser on, and switch back to optics when it's off. Each time the laser is switched on it will record the firearm's current aimer module, and then subscribes to its onAimerChange event in case you switch the aimer attachment while the laser is switched on. You can place this behaviour on the root of the weapon alongside an aimer module that is set not to start active. This will then be used with the laser.
For more information, see the WieldableLaserPointer Reference. The Demo Facility moddable pistol, shotgun and assault rifle each let you attach a laser pointer, and each use the optional aimer switch behaviour mentioned above to provide a laser aim pose.